
NES Ports Part 2
In this post, I’m going to go more in-depth into how I convert the various bits of an NES game to be compatible with the SNES. This post will be a high level of some of the more straightforward bits. Later parts will dig into specifics and focus on a few single problems that I run into while porting the games.
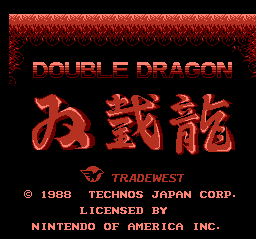
This post is again using Double Dragon as an example.
Reset and NMI vectors
The first thing that you need to get from the NES game are the reset and nmi locations. Both are these are easy enough to find, just start up Mesen, open the debugger, and reload the rom. The debugger should be at the reset vector location:
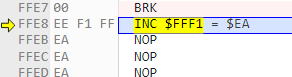
For the NMI, click on the “run to NMI” button, and you’ll be right there!
With these two addresses handy, we’ll update code in our resetvector.asm file. On line 15, we jump long to the reset vector after we’ve done all our SNES initialization code:
; this needs to be the NES game's reset vector
JML $A1FFE0
Note we’re jumping to the $A1 bank, because the game loads bank 0 in the 8000 to BFFF region initially.
Then we update the code in the nmi block to jump to the proper place after NMI. This is a bit more complicated, but this should be the only part that needs to be updated. It sets up an indirect long jump to the last active NES bank:
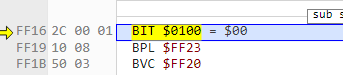
; Double Dragon NMI is at FF16
LDA #$ff
STA BANK_SWITCH_HB
LDA #$16
STA BANK_SWITCH_LB
Now we have our NES code attached to our SNES code and we’re ready to start porting the hardware calls! This is where the real fun begins!
Porting Hardware Register Calls
Now that we’ve got the SNES trying to execute the NES code, the next step is to start porting the NES specific logic to something the SNES will understand.
At a high level, this means translating what the game is trying to accomplish when it writes or reads from the NES hardware registers to something the SNES can do. The registers don’t match up 1:1, so we have to keep that in mind while we adjust the code.
Here’s a look at the most common NES registers, how I’ve seen them be used, and how I adjust their functionality for the SNES. The registers we’ll look at first are:
- PPUADDR and PPUDATA
- PPUCTRL
- PPUMASK
- Bank Switching
PPUADDR and PPUDATA
These two are the most straightforward, as they’re the most alike between the two systems. The biggest difference is that on the NES the PPUADDR register is a “write twice” register, and on the SNES it is split into VMADDH and VMADDL. Additionally, instead of PPUDATA we’ll just be writing to the low byte (VMDATAL), until we get to dealing with tile attributes.
Here’s an example from 0x1C321 of Double Dragon writing 0x80 bytes to the PPU:
  LDA #$2B
  LDX #$02
  STA PpuAddr_2006
  LDA #$40
  STA PpuAddr_2006
  LDY #$00
  LDA $0464,Y
  STA PpuData_2007
  INY
  CPY #$80
  BNE $C32F
And here’s the SNES equivilent:
  LDA #$2B
  LDX #$02
  STA VMADDH ; PpuAddr_2006
  LDA #$40
  STA VMADDL ; PpuAddr_2006
  LDY #$00
: LDA $0464,Y
  STA VMDATAL ; PpuData_2007
  INY
  CPY #$80
  BNE :-
Note that I tend to leave the original code as a comment, just in case I need to consider what the original NES code was doing.
There’s a lot of other nuances when writing to the video memory, and we’ll cover those as we go, but as far as translating the register writes, this will get you most of the way there. The things to keep in mind are:
- Writes to 23C0 - 23FF, 27C0 - 27FF, 2BC0 - 2BFF, and 2FC0 - 2FFF on the nes are not writing tiles, they are writing attributes for the tiles. This will show up as garbage if we show it, but luckily we have some tricks up our sleeves to hide it.
- Writes to 3F00 through 3F1F are writing palette data. We’ll need to handle that differently too (future blog post!)
PPUCTRL ($2000)
The PPU Control on the NES handles the following functions:
1. Enable or Disable NMI
2. PPU Master - Slave Select
3. Sprite Size
4. Background Pattern Table Address
5. Sprite Pattern Table Address
6. Vram Increment per write
7. Base Nametable address (which quadrant of BG is 0,0)
On the SNES these 3 things are handled by 3 individual registers.
The enable/disable NMI will be used at various times to make sure video work that we’re doing isn’t interrupted. For PPUCTRL, and many of the other NES registers, the NES uses a pattern like this:
Load the state of the register from memory
Adjust the current value by toggling the appropriate bits
Store the value back in memory
Write the value to the register
This ensures that it can toggle various bits on the register without losing other settings.
Most NES games will use one byte in the zero page for this purpose. Double Dragon uses $FF.
Here’s an example from Double Dragon, where it’s enabling and storing the NMI:
LDA $FF
ORA #$80
STA $FF
STA PpuControl_2000
Or’ing the current state of PPUCTRL with #$80 will ensure that the “enable nmi” is set to true.
For SNES, to enable/disable NMI we adjust the NMITIMEN register. Just like the NES code, we’ll want to keep track of what the value is while we flip bits in it. Here’s my enabled_nmi_and_store routine that updates both the PPU Control state varible, as well as enabling NMI:
enable_nmi_and_store:
    ; make sure any NMI flags are clear
    LDA RDNMI
    LDA NMITIMEN_STATE
    ORA #$80
    STA NMITIMEN_STATE
    STA NMITIMEN

    LDA PPU_CONTROL_STATE
    ORA #$80
    STA PPU_CONTROL_STATE

    RTL
Sometimes, NMI will temporarily be enabled/disabled, and not stored. In those cases we can forgo updating the PPU_CONTROL_STATE value, and just adjust our value in NMITIMEN:
enable_nmi:
    LDA RDNMI
    LDA NMITIMEN_STATE
    ORA #$80
    STA NMITIMEN

    RTL
So, taking the example from above where Double Dragon was updating the NMI value, we replace it by calling our routine:
  jsl enable_nmi_and_store
  nops 5
(note that nops 5 is a macro that will insert 5 NOP instructions. We always want to replace code with the same number of bytes, otherwise jumps/calls won’t line up)
VRAM Increment
The VRAM increment will be set to 1 if we’re writing tiles horizontally, and 32 if we’re writing columns of tiles.
Here’s an example of Double Dragon setting it to 1 (At $1FCD8 in the rom, if you’re looking for it):
LDA $FF
AND #$FB
STA PpuControl_2000
STA $FF
This is similar to our NMI example, except we’re AND ing the value with #$FB to set the VM increment to 0. Setting it to 1 would “turn on” increment by 32.
Here’s our replacement routine. This time we have to update VMAIN to set the write increment on the SNES:
set_vram_increment_to_1_and_store:
    LDA PPU_CONTROL_STATE
    AND #$FB
    STA PPU_CONTROL_STATE

    LDA VMAIN_STATE
    AND #$FC
    STA VMAIN
    STA VMAIN_STATE
    RTL
Base Nametable Address
The Base Nametable Address is a little bit different. You can think of those two bytes as controlling the High bit of the Horizontal and Veritical offset. A veritical offset of 0, with the base nametable set to 0x10 would be equivilant to the SNES having a veritical offset of 0x100
We handle this quite a bit differently, and do so during our NMI routine, so for now, I’m just going to skip this part of the porting. It deserves a bit more attention than a paragraph in this post.
PPU Mask
The PPU Mask is (mostly) used by the NES to hide or show Background Tiles, and hide or show the leftmost 8 pixels of the screen.
On the SNES we hide/show BG / Sprites individually via the TM register. Additionally, the NES uses “hide both BG and Sprites” as a sort of fblank.
For the showing/hiding the left 8 most pixels, we cheat a bit. We set up a window on the SNES, and hide or show it if either of those bits are set. Here’s the full routine for updating values from the PPU Mask state:
update_values_for_ppu_mask:
    STZ TM_STATE

    LDA PPU_MASK_STATE
    AND #$06
    BNE :+
    jsl hide_left_8_pixel_window
    BRA :++
:   jsl show_left_8_pixel_window
:   LDA PPU_MASK_STATE
    AND #$10
    BEQ:+
    STA TM_STATE
    : LDA PPU_MASK_STATE
    AND #$08
    BEQ :+
    LDA #$01
    ORA TM_STATE
    STA TM_STATE
    :

    LDA TM_STATE
    STA TM
    BEQ :+
    LDA #$0F
    STA INIDISP
    RTL
:   jsl force_blank_and_store
    RTL
It’s a bit more complex than the other calls where we set or clear single bits, but it happens less often. Check out the hardware-status-switches.asm file to get more details.
Bank Switching
The last thing that I want to dig into in this post is Bank Switching. MMC1 games bank switch to provide access to more addressable space then they would normally be allowed. Double Dragon’s 4 bank switch routines start at $1FE76 and are laid out like so:
1FE76- Sets up the games mirroring / bank mode. we don’t really have to do anything for this one (at least not yet!)1FE9E- CHR ROM sprite bank switch. Switches the tiles loaded at the 0x0000 area of the PPU Ram. This one, along with the next, are a whole blog post for themselves.1FEC6- CHR ROM bg tile bank switch. Switches tiles loaded at the 0x1000 area of PPU. More on these in the future.1FEEE- Bank switch the program code bank currently loaded in8000toBFFF. We handle this with fancy jump longs. See the previous blog post for some details.
Conclusion
With all of these things in place, we can start stepping through the SNES game, and porting bits and pieces of the NES op codes with SNES assembly. The easiest way I’ve found to do this is with a set of breakpoints in Mesen:
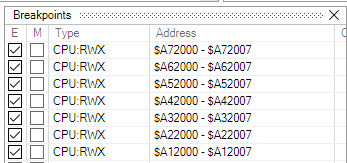
These 6 breakpoints will stop anytime the SNES tries to write to those addresses. Since the NES doesn’t have any registers at those addresses, this means it’s doing something I probably need to port.
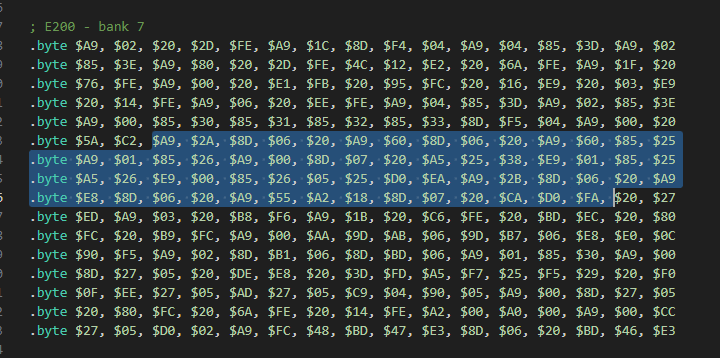
When I hit a breakpoint, the code will look something like this:
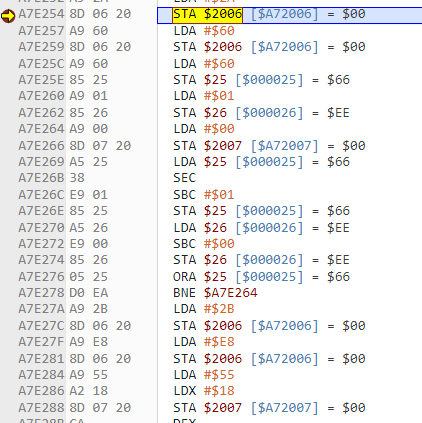
I’ll find the raw bytes for that code in my bank asm files:
And then replace it with the equivalent assembly (usually from the NES version, so I get nice labels):
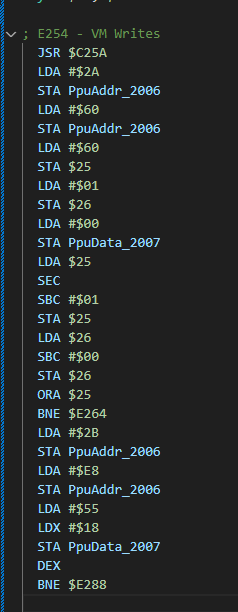
Then I do the conversion as discussed above. Rinse and repeat (a bunch) until I’m not hitting any breakpoints, and deal with all the extra special weird stuff that I find until the game is rendering a title screen!
There’s likely a few other things I ran into and didn’t talk about while I got the port to this state, but you can check out the current iteration in the part-2-title-screen-intro branch here:
https://github.com/rumbleminze/double-dragon-snes/tree/part-2-title-screen-intro